How to become a Web Developer & Which skills are needed for beginner

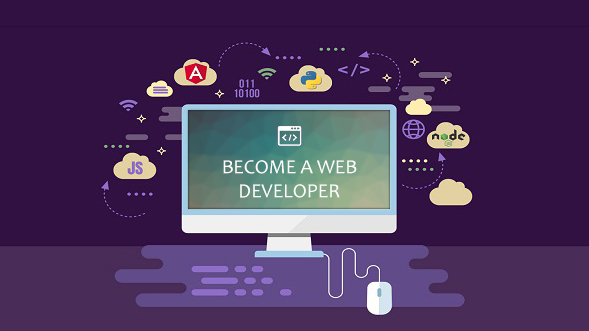
Are you trying to become a web developer, but not sure where to start?

Start with the basic web developer skills to call yourself a Web developer. Let’s get you on the way to become an excellent Web Programmer.

First, here are the basic steps you will follow in order to become a web developer.

The 7 most important skills to become a web developer!

1. HTML/CSS

HTML (HyperText Markup Language) is the standard markup language for creating websites, and HTML documents are formed by elements that are represented with tags.

HTML basics, you have to know:

This is our list of basic HTML tags:

  • <a> for link
  • <b> to make bold text
    • <strong> for bold text with emphasys
  • <body> main HTML part
  • <br> for break
  • <div> it is a division or part of an HTML document
  • <h1>… for titles
  • <i> to make an italic text
  • <img> for images in document
  • <ol> is an ordered list, <ul> for an unordered list
    • <li> is a list item in bulleted (ordered list)
  • <p> for paragraph
  • <span> to style part of text

You Can’t Write HTML Without CSS

Cascading Style Sheets (CSS) interpret documents written in a markup language. They’re a more stylized presentation of the HTML language.

CSS also describes how an HTML document will look visually as a website. It lays the bricks for a website’s font, colors, and overall layout.

Think of it this way: HTML builds the skeleton of a website. CSS gives the website its style and look.

The most basic web developer skills call for a mastery of HTML and CSS. Don’t overlook the importance of them!

Basic CSS knowledge needed:

  • Knowing how to use and when to use CSS properties (borders, text formatting, font colour)
  • CSS selectors
  • CSS classes selectors
  • Using multiple selectors
  • Inserting CSS in an HTML (external and internal)

2. JavaScript

As you master HTML and CSS, eventually you’ll want to learn JavaScript.

JavaScript is a higher level programming language. It makes websites more interactive and functional because JS can read/write data, manipulate elements on the screen, change styling and much more.

Basic JS knowledge needed:

  • Basic data types (numbers, strings, object)
  • Variables
  • Data structures (Array, JSON)
  • Functions
  • Conditional statements
  • Loops
  • Interaction with a user
  • Events
  • Manipulating DOM (Document Object Model)
  • Basic usage of the JavaScript console
  • Object-oriented programming

3. Basic Graphic Design

As a web developer, you must want to know basic graphic design. It’ll not only make your life easier, but it’ll help you perform better and faster.

This is important because somewhere along the way to becoming a web developer you will be handed a design that you will have to bring to life on the web. To make it easier for you, find below a list of graphics tools. If you learn the basics of at least three tools, listed below, it should be enough.

Basic graphic design tools:

  • Photoshop
  • illustrator
  • Figma
  • Zeplin
  • Sketch
  • Invision
  • Paint, Paint.NET (Windows); Preview (Mac) minimal tools for resizing, cropping
  • Canva for small edits online

4. WordPress

WordPress is a free content management system. It’s excellent for both beginners and for established web developers, as well.

It’s relatively easy to use since you can edit and modify web pages, add plugins, and run tests for bugs. There’s also the Yoast feature which will help you with SEO.

You’ll want to develop your website building skills using other platforms. But WordPress is not only a standard but a linchpin in the world of web development.

5. Analytical Skills

If your web developer skills are strong, you’ll create successful websites. But there’s a marketing side to the job that few people truly understand.

Of course, the most successful websites are the most functional.

But consumer behaviors are always changing. So, your design, coding, and development skills will always evolve to satisfy the ever-changing consumer.

Therefore, web developers need a strong understanding of consumers. Especially web consumers.

You’ll encounter many kinds of audiences, niche markets, and clients throughout your career. If you can understand consumers on a whole, it will only help you create websites that sell.
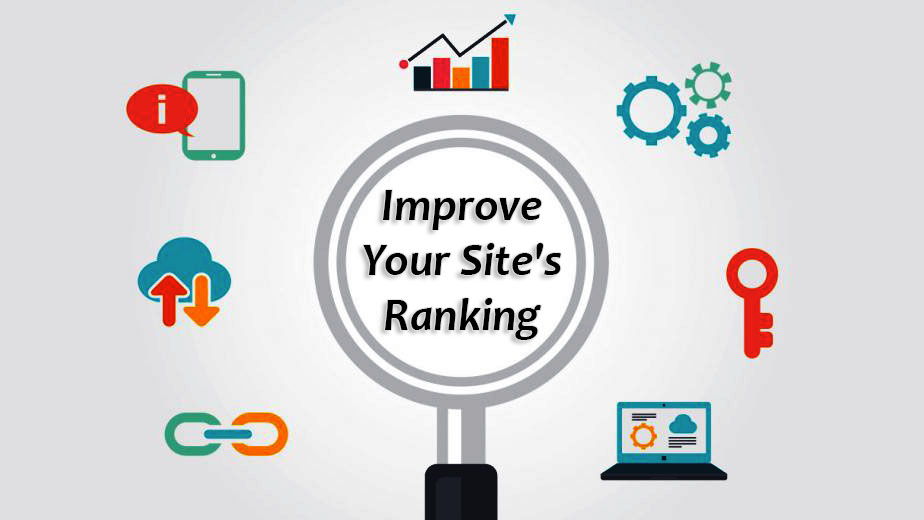
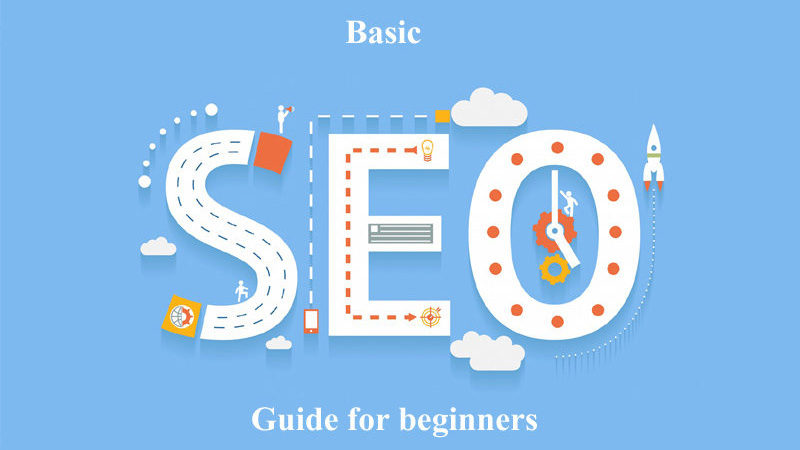
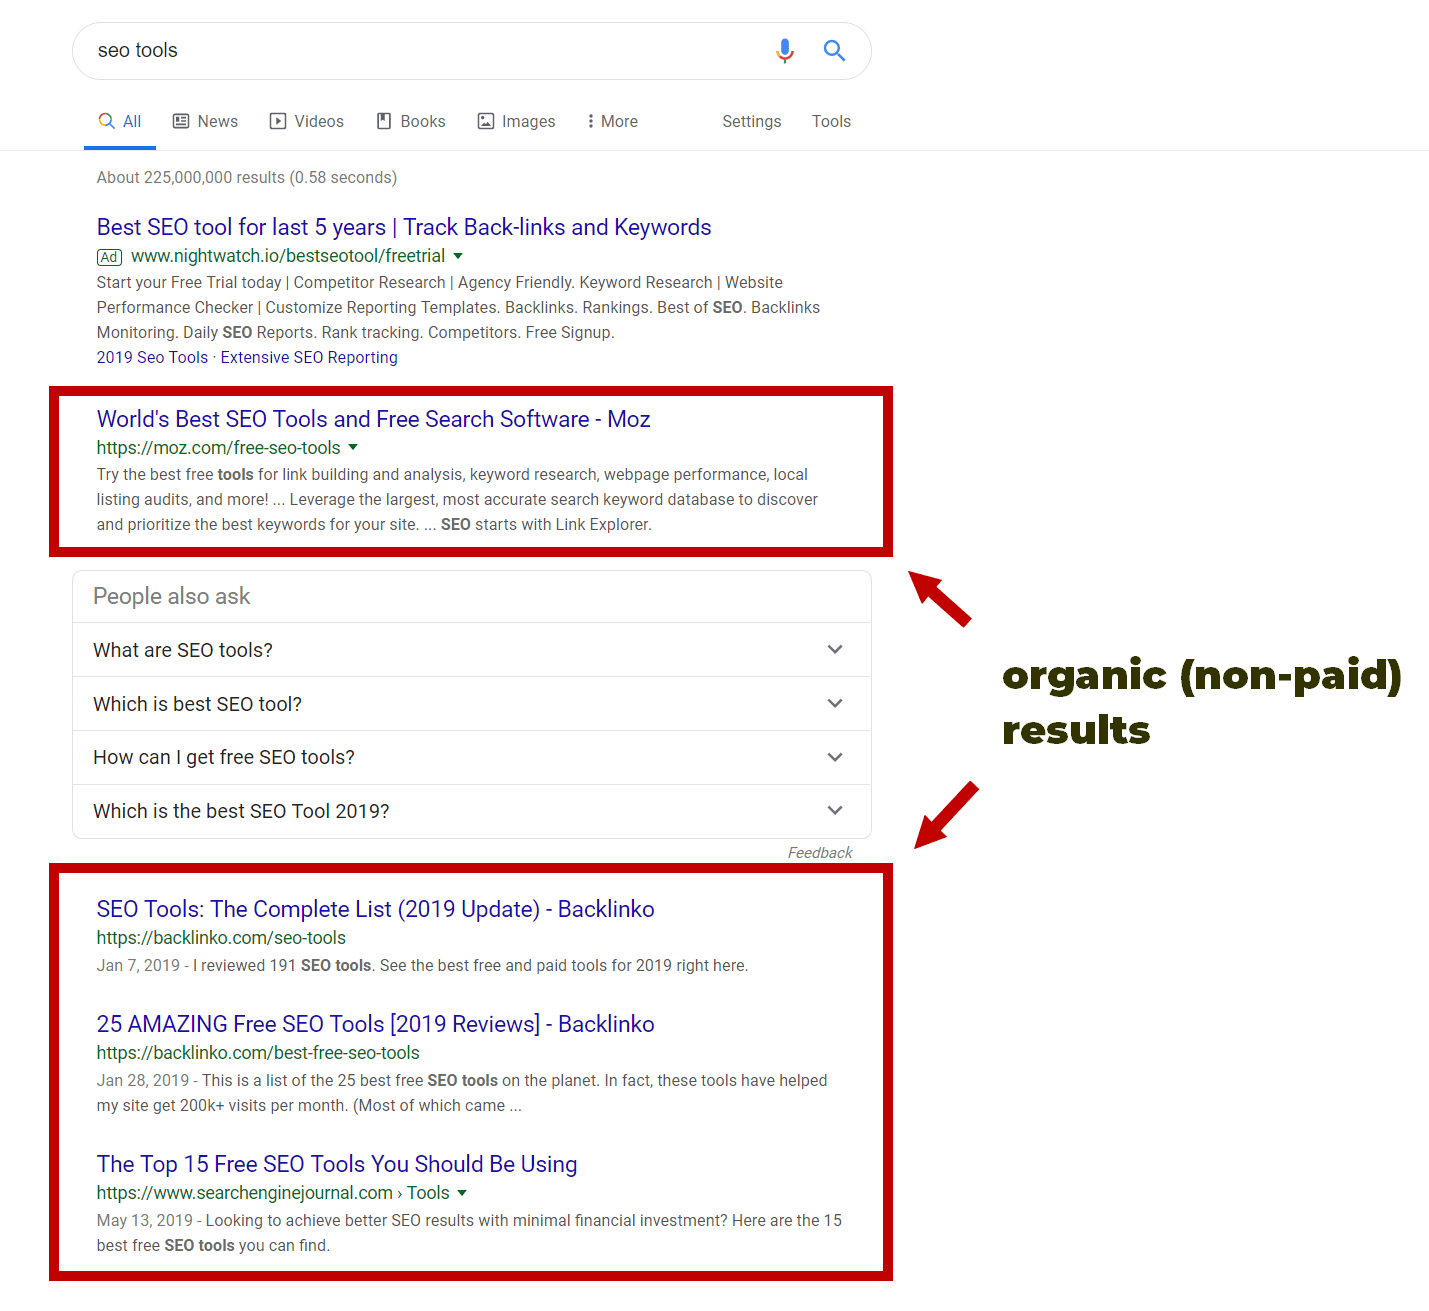
6. SEO

Search engine optimization (SEO) is the driving force behind modern day marketing.

These days, websites need SEO to attract traffic and secure leads. Most modern consumers find products and services through online searches. Websites that don’t implement SEO won’t show up high enough on search engine result pages.

Page upload speed, domain credibility, and keyword content are just some of the SEO skills that web developers can learn.

7. Responsive Design

More and more modern consumers use their mobile devices to conduct online searches. In fact, nearly 60% of online searches occur on mobile devices.

Now more than ever, websites need to adapt to this trend.

When websites aren’t compatible with mobile devices, they don’t display or function well. And when a website isn’t functional, web users normally click away and go to a competitive site.

Become a Master of Web Developer Skills

As technology advances, the web development industry will only grow exponentially.

There are web development jobs all over the world. And by mastering these 7 skills, you can compete for the highest paying jobs!

Are you ready to discover the possibilities in a web development career?

How to Improve Your Site Ranking SEO

How to improve your Site’s Ranking (SEO)

Follow these suggestions to improve your SEO (search engine optimization) and watch your website to the top of search-engine results.

Step 1 – Publish Useful, High Quality, Relevant Content

Quality content is the number one driver of your search engine rankings and there is no substitute for great content. Quality content created specifically for your intended user increases site traffic, which improves your site’s authority and relevance.

Another reason to create highly useful content is that when visitors bookmark your content on Chrome, it will improve SEO ranking of your website in Google.


Keywords:

Identify and target a specific keyword phrase for each page on your website and think about how your reader might search for that specific page.


Multiple Keyword Phrases:

It is very difficult for a webpage to achieve a search engine ranking for multiple keyword phrases – unless these phrases are very similar.

If you want your website to rank for multiple keyword phrases, you need to create a separate webpage for each keyword phrase.

Placing Keywords:

Once your keyword phrase is chosen for a given page, consider these questions:

  1. Can I use part or all of the keyword phrase in the page URL (by using keywords in folders)?
  2. Can I use part or all of the keyword phrase in the page title?
  3. Can I use part or all of the keyword phrase in page headings and subheadings?
  4. Answering yes to these questions can improve your search engine ranking.


Content:

Content beyond the URL, title and title of the page is the most influential in search engine rankings. Repeat your keyword phrase several times throughout the pages. The opening and closing paragraphs once or twice, and the rest of the content two to four times.

Be sure to use bold, italic, title tags (especially an H1) and other emphasized tags to highlight this keyword phrase – but don’t overdo it. You still want to read your language and writing style naturally. Never forsake good writing for SEO. The best pages are written for the user, not for the search engine.


Step 2 – Update Your Content Regularly

You have probably noticed that we feel strongly about the content. Search engines do, too. Regularly updated content is seen as one of the best indicators of site relevance, so be sure to keep it fresh. Monitor your content on a set schedule (for example semesterly) and update as necessary.


Step 3 – Metadata

When designing your website, the metadata sert on each page contains one of the <head> tags or information about the content of your page. If you have a CMS site originally produced by the UMC Web Team, this data will be pre-populated for you. However, it’s important to review and update your site’s metadata over time.


Title Metadata:

The title metadata is responsible for the titles displayed on the page at the top of the browser window and as the title in the search engine results. This is the most important metadata for your page.

For those who have a CMS website, the web team has created an automated system for generating meta titles for each webpage based on the title of your page. This further accentuates the importance of using well-thought-out page titles in keyword phrases.


Description Metadata:

Description metadata is the textual description that a browser may use in your page search return. Think of it as your site’s window display a concise and appealing description of what is contained within, with the goal of encouraging people to enter. A good meta description will typically contain two full sentences. Search engines may not always use your meta description, but it is important to give them the option.


Keyword Metadata:

Keyword metadata is rarely if ever used to tabulate search engine rankings. However, you should already know your keyword phrases, so it doesn’t hurt to add them into your keyword metadata. You’ll want to include a variety of phrases. As a general rule, try to keep it to about 3-7 phrases with each phrase consisting of 1-4 words.


Step 4 – Have a Link-Worthy Site

Focus on creating relevant links within the text. Try typing the name of the destination instead of the “click here” link. “Click here” has no search engine value beyond the linked URL, but is keyword rich and will improve the ranking of your search engine as well as the page you are linking to. Always use descriptive links by linking keywords – It not only improves search engine optimization, but also adds value to your readers, including disabled or screen reader users.


Step 5 – Use alt tags

Always describe your visual and video media using alt tags, or alternative text descriptions. They allow search engines to locate your page, which is crucial—especially for those who use text-only browsers or screen readers.


Step 6 – Site Architecture And Navigation

When visitors can’t find what they need on a website right away, they most likely leave the site and this contributes to high bounce rate, low dwell time and low number of pages viewed.

A well-thought-out site architecture reflected in clear navigation is critical in helping visitors find what they want on your site, accomplish their goals and come back repeatedly (repeated visits can improve SEO ranking.)

A “flat” site architecture not only makes content easier to find, it can also help improve SEO ranking as it surfaces links of all critical pages making it easier for search engines to crawl the entire site.

If you want to improve your App’s Ranking in Google Play Store then Click Here.

Posted in: Seo
how-to-install-laravel

How to Install Laravel on Localhost

Getting Started With Laravel Basic Concepts & Installation on Localhost.

# Laravel Basic Requirements

Since we want to work with the latest version of Laravel, let us first have a look at the basic requirements:

  • PHP >= 7.1.3
  • OpenSSL PHP Extension
  • PDO PHP Extension
  • Mbstring PHP Extension
  • Tokenizer PHP Extension
  • XML PHP Extension
  • Ctype PHP Extension
  • JSON PHP Extension

# Install Xampp

First of all, we need Xampp, so we can Download it from Here the official site.

xampp

# Composer

Composer is a PHP package manager that is integrated with Laravel Framework.

After you’ve downloaded and installed Xampp, now we need to install Composer.

Laravel needs the Composer program to manage its extensions. If you do not have this program, you can Download it from Here the official site.

composer

composer

After downloading Composer.exe, run it, in the installation process, if you are prompted for the php.exe path, its address in your system is xampp/php by default.

If the composer is installed correctly, you’ll see below picture by entering composer command in cmd.

compo

Now to install Laravel on the localhost, type below command in cmd.

C:\> cd xampp

C:\ xampp>cd htdocs

xampp

Now in the corresponding path, enter the following command to create a new Laravel project:

Composer create-project –prefer-dist laravel/laravel new_project

Now, Laravel is being installed on your system. After installation, go to the new_project folder and execute the php artisan serve command.

C:\ xampp\ htdocs > Cd new_project

C:\ xampp\ htdocs \ new_project >php artisan serve

comand

A new message will be displayed on the server and your work on cmd will be completed.

Just open your browser and enter one of the addresses below.

http://127.0.0.1:8000

http://localhost/new_project/public

At this moment, your new Laravel project will be successfully installed and run.

laravel-face

SEO Basic Guid For Beginners

Before we dive into specific techniques and aspects of how to learn SEO in 2019, let’s start with the basic stuff in the first chapter. Are you ready? Welcome to the ultimate SEO guide for beginners!

Are you new to SEO? Do you wonder how it works and what matters most in 2019? You’re at the right place!

So Now, let’s get started!

What is SEO?

Search engine optimization (SEO) is a process of improving positions in organic (non-paid) search results in search engines. The higher the website is, the more people see it.

The history of SEO dates back to the 90s when the search engines emerged for the first time. Nowadays, it is an essential marketing strategy and an ever-growing industry.

seo-besic

If you want to learn SEO, you should be ready for a lot of creative, technical and analytical work. There are many techniques with different goals, however, the main point will remain the same – to be among the highest results in organic searches.

Simply said, SEO is about running the right website for the right people.

It isn’t only about a perfect structure or technical background of the website. Your website has to be filled with quality and well-optimized content tailored to the needs of your audience.  And of course, it has to be good enough to be linked from other websites.

Is SEO difficult?

Search engines such as Google, Bing, Yahoo! and others index websites to create an order based on various ranking algorithms. Can we identify these algorithms? Yes and no.

Google uses more than 200 ranking factors. Though we know many of them: quality content, backlinks, or technical things such as site speed, there are many of them kept as a secret.

Of course, you don’t need to know all the factors to rank with your website. To understand what SEO is all about, imagine a bowl of soup. There are three important aspects:

  1. The bowl represents the technical stuff behind the website (technical and on-page SEO) – without proper bowl, the soup would spill all over the table.
  2. The soup represents the content of your website – it is the most important part. Bad content = no rankings, it is that simple.
  3. The seasoning represents the quality backlinks increasing the authority of your website – the last ingredient to make your SEO soup perfect.

SEO-basic

The search engines are used by internet users when they are searching for something. And you want to be that “something. It doesn’t matter whether you sell a product, service, write a blog, or anything else, search engine optimization is a must.

Your website needs to be indexed by search engines. Otherwise, you’re lost.

Wise SEO activities improve your rankings in the search engine results page (SERP). Higher rankings mean higher traffic. If the traffic is engaged, it will bring conversions.

To sum it up, if you plan to succeed with your website, you need to do SEO. Some aspects are more complicated, but very often, the SEO success stands on common sense and a few best practices.

How can I learn SEO? Do I need someone’s help?

Even the basic changes can make a huge difference in how search engines see your website. In this ultimate SEO guide for beginners, we’ll cover all the critical topics and SEO basics. You’ll gain enough knowledge to proceed with SEO on your own.

If you wonder how to learn SEO in 2019, we have a simple answer for you: You’ll need a lot of study and practice. The good thing is that you’ll find tons of information on the internet for free (including this SEO guide) but you should choose wisely. On top of that, you can attend various courses, classes or webinars.

If you don’t want to bother yourself that much or don’t have time, you can ask SEO consultants, specialists or agencies for help. Keep in mind that this way won’t be for free compared to this guide.

Basic terms vocabulary

  • On-page vs. off-page SEO
  • White hat vs. black hat vs. grey hat SEO

On-page vs. off-page SEO

Doing On-page (on-site) SEO means optimizing your website to affect the organic search results. It’s everything you can do on the website – from content optimization through technical aspects:

  • meta tags
  • headings
  • URL structure
  • images optimization
  • content
  • structured data
  • website size and speed

Off-page (off-site) SEO covers all activities you can do to improve the website SEO authority through getting backlinks from other websites. There are many ways to get them:

  • email outreach
  • guest blogging
  • submissions
  • social media efforts
  • cooperation with influencers
  • writing valuable content, so people would love to link to your website

White hat vs. black hat vs. grey hat SEO

Black hats vs. white hats have their origin in Western movies. It’s like bad guys vs. good guys. But don’t take these words too seriously. Opinions on both SEO approaches tend to differ.

white-and-black-and-grey

Black hat SEO is a set of unethical practices to improve rankings of a website in the search engine results page. They are designed to affect search engines while not taking human factor into consideration.

Black hat SEO can get you to the top of the SERP in a short time, however, search engines will most probably penalize and ban the website sooner or later.

Lists of violating practices can be found in Here.

White hat SEO is a set of ethical techniques sticking to the guidelines and rules. The basic parts of white hat SEO are:

  • quality and relevant content
  • overall website optimization
  • link building

White hat SEO is a long-term strategy oriented to improve the user experience. Generally speaking, being a good guy in the world of SEO is considered the proper direction.

Grey hat SEO techniques that do not fall into either black hat SEO or white hat SEO are often called gray hat SEO. In general, the SEO public is more tolerant to them as they do not really harm anyone although gray hat SEO definitely isn’t “playing by the book”.

Let’s compare these two backlinks:

The first backlink is bought from a PBN made specifically to sell backlinks. The article contains 500 words and does not provide any added value to the reader. Actually, the website has no traffic at all and it links to anyone who is willing to pay.

The second backlink is bought from a high-quality website in the same niche as your website. The article where the link is placed is well-researched and gets some real traffic. People reading the article actually want to visit your site via the link, as it provides added value and makes sense in the context of the topic.

Posted in: Seo

Magento Installation Guid in 6 Step

Hello Magento buddies,

Magento is an ecommerce platform built on open source technology which provides online merchants with a flexible shopping cart system, as well as control over the look, content and functionality of their online store.
And also it is a high-performant, scalable solution with powerful out of the box functionality and a large community built around it that continues to add new features.

Here’s a step-by-step procedure that will hopefully save you a headache. Please note that I run XAMPP, so this tutorial is written for XAMPP only and is on Windows.

DON’T MISS THE UPDATE Magento 2 Installation.

To install Magento, you should follow these instruction:

  1. Webserver setup and PHP configuration.
  2. Magento Installation on localhost with XAMPP.

Webserver setup and PHP configuration in Magento installation

Step 1: Set up webserver

     1. May be you have the latest version installed XAMPP. or if you can download from Here.

     2. After downloading XAMPP, please click on the file to install it on your computer.

magento-installation

3. Select Components:

Plase select the same as in the image.

magento-installation

     4. Choose Install Location: XAMPP default location is C:\xampp. If you need to change the destination, click on the Browse botton to change your destination for XAMPP program and then click on Next to go to the next step.

magento-installation

magento-installation

     5.  Start installing XAMPP.

magento-installation

     6. Complete the XAMPP setup.

You will see the setup asks: “Do you want to start the Control Panel now?” Click on the Finish button to end this setup and XAMPP prompt to use.

magento-installation

Step 2: Config PHP

magento-installation

In the XAMPP Control Panel, you can see the row Apache, please click on the Config button and click PHP(php.ini), then remove comment “;” in some rows:

extension=php_curl.dll
extension=php_mcrypt.dll
extension=php_pdo_sqlite.dll
extension=php_pdo_mysql.dll
extension=php_soap.dll

After that, please click on the Start button on 2 rows Apache and MySQL to start them:

magento-installation

Step 3: Config host file

Open the file C:\Windows\System32\drivers\etc\hosts. Add the following code to the last row of the file:

127.0.0.1   www.localhost.com

This is the first part of Magento Installation, now take heed of next part of this guide.

Magento Installation on localhost with XAMPP

Step 1: Download magento and sample data

Using a browser, download the latest full released archive file from Here.

The archive file is available in .zip, .tar.gz, and .tar.bz2 formats for downloading (a zipped archive contains exactly the same files and is provided in different formats just for your convenience).

On your computer, extract Magento from the downloaded archive. Magento has a folder named magento containing all of the Magento files which will be created, for example, data has a file called “magento_sample_data_for_1.6.1.0.sql” and a folder called “media“.

Step 2: Import the Magento sample data into an empty store database

Create a new empty database for Magento.

Using a browser, enter the url: to create a new empty database by using phpMyAdmin:

magento-installation

Create an empty database named “magento”:

magento-installation

Import the sample data sql file (magento_sample_data_for_1.6.1.0.sql) into your empty Magento database:

Use the import function of your database management tool to import the data in the .sql file into your empty database.

magento-installation

Step 3: Installing Magento

Finally, we can start installing Magento on our local machine. First, restart your Apache and MySQL servers. If you didn’t stop them before and have been editing them while they were on, just stop them now and restart them. Copy magento folder after extracting Magento from the downloaded archive to xampp\htdocs:

magento-installation

Using a browser, enter the url: to start installing magento:

magento-installation

Tick the checkbox “I agree to the above terms and conditions” and click on the Continue button to continue. Then change the Time Zone, Locale and Currency and continue:

magento-installation

Next, please find the database: Host, Database Name, User Name and User Password:

magento-installation

Next, please fill in the Personal Information: First Name, Last Name and Email

And fill up the Login Information to use for admin (backend): Username, Password and Confirm Password

magento-installation

Also, you don’t need to worry about filling in the Encryption Key. Magento will generate a key for you on the next page (just like it says). It’s highly recommended that you write that key down somewhere so that you won’t forget it. Once you’ve finished filling out the form, click on the “Continue” button and write down your encryption key!

After you get your encryption key locked away in a fireproof safe, you can choose to go to Frontend or Backend of your new Magento installation.

magento-installation

Step 4: Copy media to source

Copy media folder after extracting the Sample data from the downloaded archive to xampp/htdocs/magento

magento-installation

Step 5: Refresh cache and reindex data

Please click the “Go to Backend” button in step 3, you can see the admin login page, you need to fill up Username and Password for admin as in step 6:

magento-installation

Reindex data:
Go to the admin page and then please see the System menu, click on Index Management:
magento-installation
You can see the Index Management page:
First, please click on Select All. For Action field, please select Reindex Data before clicking on the Submit button:
magento-installation
After the system reindex data, a success message will be shown:
magento-installation
Refresh the cache:
Go to the admin page, notice the System menu, please click on Cache Management:
magento-installation
Please click Select All. For action field, please select Refresh and then click on the Submit button:
magento-installation
After the system reindex data, a success message will be shown:

magento-installation

Step 6: Go to Frontend

Clicking on the “Go to Frontend” button in step 3, you can see the magento site:
magento-installation

Hope that this post will help you to successfully install Magento – a great ecommerce platform.

How-to-Install-Magento-2-on-Localhost

How to Install Magento 2 on Localhost

Magento is an ecommerce platform built on open source technology which provides online merchants with a flexible shopping cart system, as well as control over the look, content and functionality of their online store.
And also it is a high-performant, scalable solution with powerful out of the box functionality and a large community built around it that continues to add new features.
So Now, let’s get started! how to install megento 2 on localhost.

Part 1: Install and configure XAMPP

Step 1: Download XAMPP

You can download the latest version XAMPP from Here.

Step 2: Install XAMPP

After downloading XAMPP, double-click on the file to install it on your computer.

Click Next.

how-to-install-magento-2

Leave the default selection as in the image. Click Next.

how-to-install-magento-2

Choose your installation folder. The default location is C:\xampp. After that, click Next.

how-to-install-magento-2

Click Next.

how-to-install-magento-2

Click Next.

how-to-install-magento-2

Setup will now install xampp on your computer. Please wait for a while.

how-to-install-magento-2

After setup is finished, you will see the option “Do you want to start the Control Panel now?”. Keep it selected. Click Finish to exit setup and enter XAMPP Control Panel.

how-to-install-magento-2

Step 3: Configure XAMPP

In XAMPP Control Panel, click Config button on Apache row, and click “PHP (php.ini)”.
In the php.ini file, find these rows and remove “;” before each row:

extension=php_curl.dll
extension=php_pdo_sqlite.dll
extension=php_pdo_mysql.dll
extension=php_soap.dll

how-to-install-magento-2

After you’ve done, save and close the file. Then, click the Start button on 2 rows Apache and MySQL to start them. Don’t quit XAMPP after this step, just let it run.

Step 4: Configure host file

Open file “C:\Windows\System32\drivers\etc\hosts”. Add the following line to the last row of the file:

127.0.0.1 www.localhost.com

Part 2: Download and install Magento 2

Step 1: Download Magento 2 with sample data

You can download the latest Magento 2 from Here.

how-to-install-magento-2

The archive file is available in 3 formats: .zip, .tar.gz, and .tar.bz2. They are all the same, you can choose any format you like. Then, click Download. If you are not logged in yet, there will be a popup requiring you to sign in to your account. If you don’t have an account, click on “Create an account now”.

how-to-install-magento-2

After the download is complete, create a folder inside “xampp\htdocs” and extract the downloaded archive file into that folder. This will take some time.

Step 3: Create a new empty database for Magento 2

Browse the URL http://localhost/phpmyadmin/ to access phpMyAdmin page. Create a database name (“Magento2”, for example) and click Create.

how-to-install-magento-2

Step 4: Install Magento 2

With XAMPP still open, in your browser, enter the URL http://localhost/your_database_name to start installing Magento 2. In previous step, I named my database as “Magento2” so I enter the URL “http://localhost/Magento2”.

Click “Agree and Setup Magento“.

how-to-install-magento-2

Click “Start Readiness Check“.

how-to-install-magento-2

It will then check your server environment if it is ready to install Magento 2. If there are errors remaining (the red X), you will have to solve them first before you can proceed to the next step.

*Tips to solve PHP problems:

  • PHP Settings Check: On XAMPP Control Panel, click “Config” on Apache row, then click “PHP (php.ini)” to open php.ini file. Find the line “always_populate_raw_post_data” and delete “;” at the start of the line.
  • PHP Extensions Check: for any missing extension, find the string “php_extension-name.dll” and delete “;” at the start of that line. For example, according to the Check, I am missing XSL extension, so I look for “php_xsl.dll” in php.ini file and then delete “;” at the start of the line.

After you’ve solved all issues, save and close php.ini file and restart XAMPP. Then, click “Try Again” to refresh Magento 2 Installation page.

how-to-install-magento-2

Click Next.

how-to-install-magento-2

Add a database: Database Name is the name of the database you created in Step 3. You can leave other fields as default. Click Next.

how-to-install-magento-2

Enter the URL for your store address and Magento admin address. You can leave these by default or edit as you wish. Then, click Next.

how-to-install-magento-2

Edit your store’s time zone, default currency and default language. Click Next.

how-to-install-magento-2

Create an admin account. This will be the account that you use to log into your Magento backend. After you’ve filled in all the fields, click Next.

how-to-install-magento-2

Finally, click Install Now.

how-to-install-magento-2

The installation will take a while.

how-to-install-magento-2

That’s it! You have finished installing Magento 2 on your localhost. Now you can access your Magento 2 frontend/backend and start exploring Magento 2 features. I hope you find this post helpful 🙂